 |
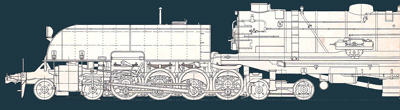
(April 2015) Once again a year has passed since I did the last work on this project. I worked on the other two projects (SHM26 and NS6200) running simultaneously. We also finished yet another domestic project (putting a dormer on the back of our house) which made me miss out on most of the winter 2014-2015 modelling season. I left off last year with two frames and the superstructure completed. Next step is getting the two frames in running order.
Before I could assemble the drive mechanism of the two power engines the frame needed painting. Once assembled that is virtually impossible.
The first job at hand was reconstructing a set of buffer steps. Two sets had come loose during the long storage period. I could retrieve one from the box but the other had got itself lost. |

With the sole survivor as example, I cut 0.3 mm brass sheet to size. |

Bending edges were deeply scored into the brass |

Bent... |

and soldered. The calliper is a good indication of the "size". |
Painting the frames |

I started painting the frames upside down. Here one is done "medium". |

Both frames "well done" |

Next I gave them a light weathering and clear coat.
I forgot to cover the axle bearings by the way so I need to clean them out.
|
Painting the wheelsets
Painting the wheels is matter of "long breath", as we Dutch put it. Eight drivers axles, eight carrying axles, 32 wheels in all. For each wheel
- one coat of base coat,
- one black coat,
- one dull clear coat,
- one bit of weathering.
This means 128 wheel paint actions! |

To make life a little easier I made myself two spray templates from brass. The two holes are for the different wheel sizes.
Each driver was sprayed separately. |

which leaves a graphic pattern on the underlayment (a sheet of cheap paper) |

The bogie wheels came in pairs so I made two templates beforehand. I could now paint the wheelsets in one go. The rubber bands hold everything together. |

All wheels are black. I took the bogies in the stride. |

Dull clear coat applied on the wheels and bogies. |
 |
And a bit of weathering. It looks quite a lot of weathering when compared to the original black wheel but that is very much a photographic illusion.
Seen on their own it not so much as it looks now. I used Revell Matt 84 and diluted it thee times (1:2) with thinner. One quick pass of the airbrush did all the work |

Cleaning the wheels's tread with an cotton ear swab that is made just moist with thinner |

Done. See, the weathering isn't so heavy as it appeared on the previous photos |

The final result
When mounting the wheels on their axles remember that they should be quartered. The right hand wheels should advance over the left hand wheels by 90 degrees when running forward. |

Sign my
GuestBook